An Android library is structurally the same as an Android app module. It can include everything needed to build an app, including source code, resource files, and an Android manifest. However, instead of compiling into an APK that runs on a device, an Android library compiles into an Android Archive (AAR) file that you can use as a dependency for an Android app module.
For creating your own Android library for android application first start the Android Studio and open your previously created application project. [ Refer How to develop first android Application/App in Android Studio ]
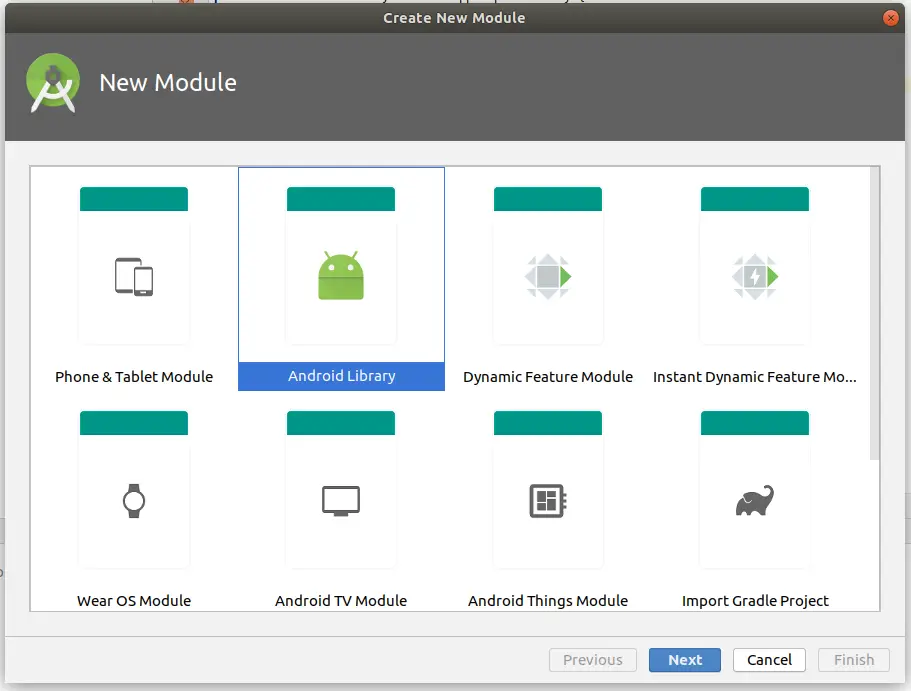
From Android Studio select “File -> New -> New Module” as show below,

From the opened window, select “Android Library” and click “Next”
From the next opened window, you will need to specify “Library Name” , Module name i.e. name of directory created for the library and “Package Name” for the library. You can edit all the default strings as you want and then click “Finish”
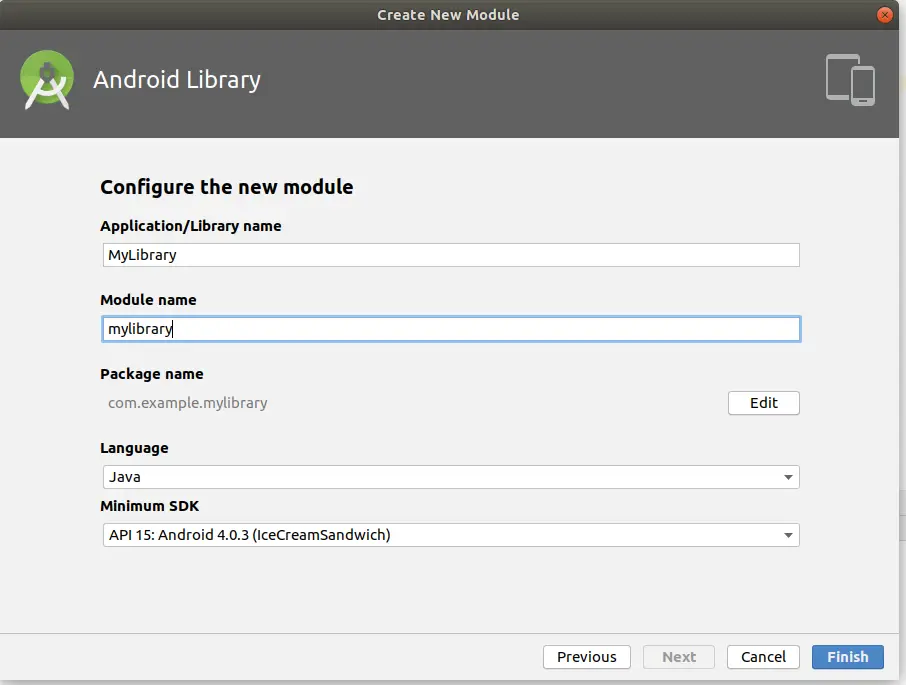
As you can see above, we have given package name to our library as “com.example.mylibrary” and module name as “mylibrary” so similar named folder will get created inside the application and Studio proceeds to create the default framework code for the library and also updates settings.gradle of your application to add reference of library as,
$ git diff settings.gradle
diff --git a/settings.gradle b/settings.gradle
index e7b4def..9c982a3 100644
--- a/settings.gradle
+++ b/settings.gradle
@@ -1 +1 @@
-include ':app'
+include ':app', ':mylibrary'
The default created source code looks like as below,
$ tree mylibrary/
mylibrary/
├── build
│ ├── generated
│ │ └── source
│ │     └── buildConfig
│ │         └── debug
│ │             └── com
│ │                 └── example
│ │                     └── mylibrary
│ │                         └── BuildConfig.java
│ └── intermediates
│     ├── check_manifest_result
│     │ └── debug
│     │     └── checkDebugManifest
│     │         └── out
│     ├── lint_jar
│     │ └── global
│     │     └── prepareLintJar
│     └── lint_publish_jar
│         └── global
│             └── prepareLintJarForPublish
├── build.gradle
├── consumer-rules.pro
├── libs
├── mylibrary.iml
├── proguard-rules.pro
└── src
    ├── androidTest
    │ └── java
    │     └── com
    │         └── example
    │             └── mylibrary
    │                 └── ExampleInstrumentedTest.java
    ├── main
    │ ├── AndroidManifest.xml
    │ ├── java
    │ │ └── com
    │ │     └── example
    │ │         └── mylibrary
    │ └── res
    │     ├── drawable
    │     └── values
    │         └── strings.xml
    └── test
        └── java
            └── com
                └── example
                    └── mylibrary
                        └── ExampleUnitTest.java
Reference : https://developer.android.com/studio/projects/android-library
3 thoughts on “Creating AAR library for Android apps using Android Studio – Part 1”